Users
Short Description
A person or machine using an application built with NoCode-X, often referred to as an end-user, interacts with and utilizes the application for its intended purpose. Users can have certain rights and/or belong to groups. Users & their rights are managed in “user management“. Users are linked to a workspace which actually mean that users can have a single-sign-on experience for all applications built for a company within NoCode-X.
Step-by-Step Manual: Creating a User
-
Open User Management
On the left ribbon, click “Users”. -
Start User Creation
In the top right, click “+create user”. -
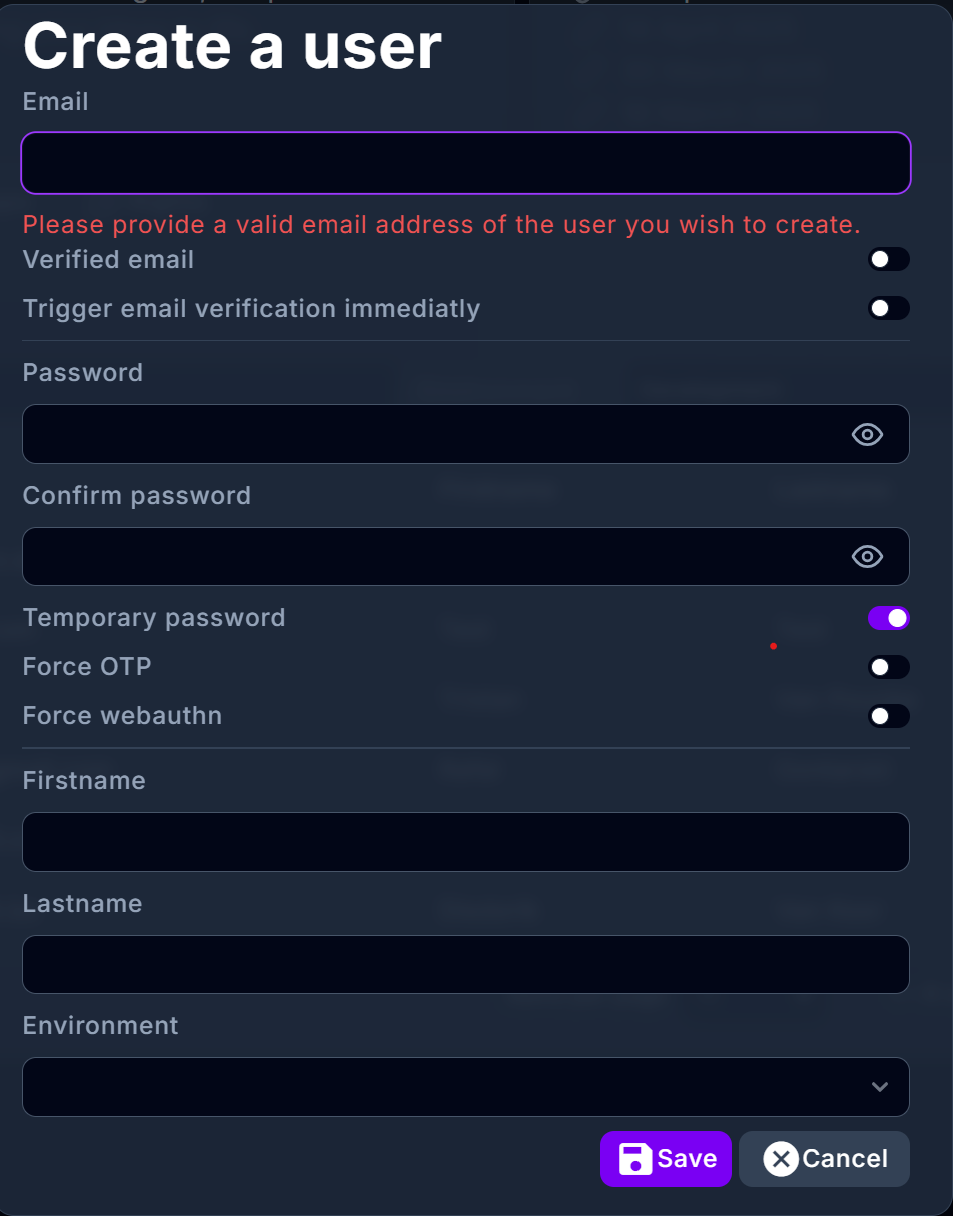
Complete the User Form
Fill in the following fields:- Email: The user’s email address (used as their username).
- Password: Set an initial password (minimum 8 characters, at least 1 number, and 1 uppercase letter).
- Confirm Password: Re-enter the password to confirm.
- Temporary Password: (Boolean, ON by default)
If ON, the user must change their password at first login. - Force OTP: (Boolean, OFF by default)
If ON, the user must set up a One-Time Password (OTP) authenticator app. - Force WebAuthn: (Boolean, OFF by default)
If ON, the user must register a WebAuthn device (like a security key or biometric device). - Firstname: The user’s first name.
- Lastname: The user’s last name.
- Choose Environment: Select one: development, test, acceptance, or production.
-
Save the User
Click “Save” to store the user information.
-
Open User Management
On the left ribbon, click “Users”. -
Start User Creation
In the top right, click “+create user”.
Context on Why These Options Matter
Temporary Password: What Is It and Why?
A temporary password means the user must change their password the first time they log in.
Why?
This ensures that only the user knows their password, keeping authentication secrets personal and secure. It’s a best practice to prevent anyone else (including admins) from knowing the user’s password.
OTP (One-Time Password): What Is It and Why?
OTP is a form of two-factor authentication (2FA) where the user must enter a code from an authenticator app (like Google Authenticator) in addition to their password.
Why?
OTP greatly increases security by requiring something the user knows (password) and something they have (their phone/app). It protects against password theft and phishing.
WebAuthn: What Is It and Why?
WebAuthn is a modern, passwordless authentication method using public-key cryptography. Users can log in with biometrics (like fingerprint or face recognition) or hardware security keys.
Why?
WebAuthn is highly secure, resists phishing, and is more convenient for users. It eliminates password reuse and reduces the risk of data breaches.
Environments: Why Use Distinct Users?
NoCode-X applications have four environments: development, test, acceptance, and production.
Why is this important?
- Separation of Concerns: Keeps test data and real user data apart, preventing accidental exposure or interference.
- Security: Limits the risk of test users or test data leaking into production.
- Best Practice: Ensures that only real, validated users exist in production, while developers and testers use separate accounts in non-production environments.
Deleting a User
Be careful: deleting a user is a destructive action and cannot be undone.
Step-by-Step Manual: Deleting a User
-
Open User Management
On the left ribbon, click “Users”. -
Select Options for the User
On the right of the user you want to delete, click “...”. -
Select Delete user
Choose the option in the menu "Delete user".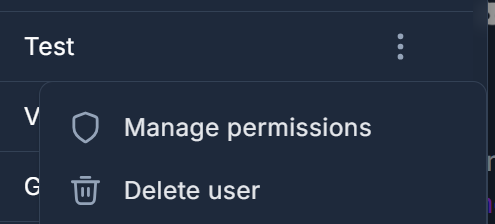
-
Confirm the Deletion of the User
Confirm the deletion when prompted.
This action will also revoke all memberships, permissions, and rights associated with the user.
By following these steps and understanding the reasons behind each option, you ensure secure, organized, and scalable user management in NoCode-X.